A great way to protect your intellectual property is to add a watermark to a PowerPoint presentation.
Embedding a logo secures your content from unauthorized duplication, which is particularly crucial when sharing decks online. Additionally, it can serve as subtle branding, reinforcing your identity.
For anyone aiming to maintain ownership and showcase professionalism, adding a watermark is the best strategy.
Method 1. Online PDF editor
A watermark is an effective way to claim authorship of your slideshow or discourage unintended use. Utilizing an online solution simplifies the process significantly, eliminating the need to tinker within PowerPoint itself.
Step One. Convert your PowerPoint to the PDF
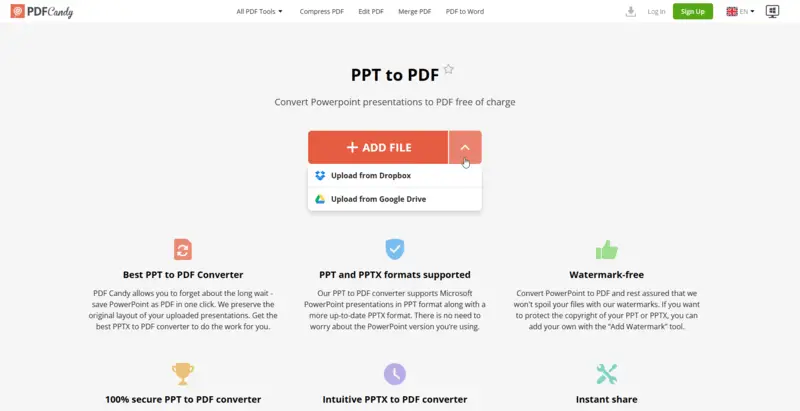
- Open the online PPT to PDF converter in your preferred browser.
- Click "Add file" or drag and drop your panel into the browser. Also, you can upload a presentation from Google Drive or Dropbox.
- Download the output PDF.

Step Two. Apply a needed watermark to the PDF
- Access the watermark creator and press the "Add file" button to browse the PDF.
- Input your desired text or an image
- Adjust its position—top, middle, or bottom; left, center, or right. Once configured, hit "Add Watermark".
- Click "Download File" to retrieve your processed document.

Advantages of this PDF online converter:
- The interface is intuitive, so you don’t need any specialized knowledge to operate it.
- It works seamlessly on any device connected to the internet—desktop, mobile, whatever you’re using.
- Applying a watermark across all pages is handled automatically with a single action.
- The platform provides a free online PDF converter.
- User privacy and file security are prioritized; your data stays confidential.
- Additional utilities are available, including PDF merging and splitting tools for further management.
- After downloading, you can securely store files to integrated cloud services.
Our platform is particularly useful for educators building lecture slides, students compiling group projects, professionals generating business reports, or freelancers delivering client assets. Basically, if need to secure your content, this tool has you covered.
Following these simple steps, you can quickly create a custom watermark in a PPT presentation in no time!
Method 2. Built-in PowerPoint tools
Watermarking your presentation directly in PowerPoint is actually a pretty effective way to protect your proprietary rights and make sure your name stays on your content.
Microsoft bakes in a suite of features—think WordArt, SlideMaster, and the basic Text Box—that can handle the task without external software.
Option One. Text Box
How to insert a custom watermark in PPT via a text box:
- Open the target slide you wish to add a watermark to.
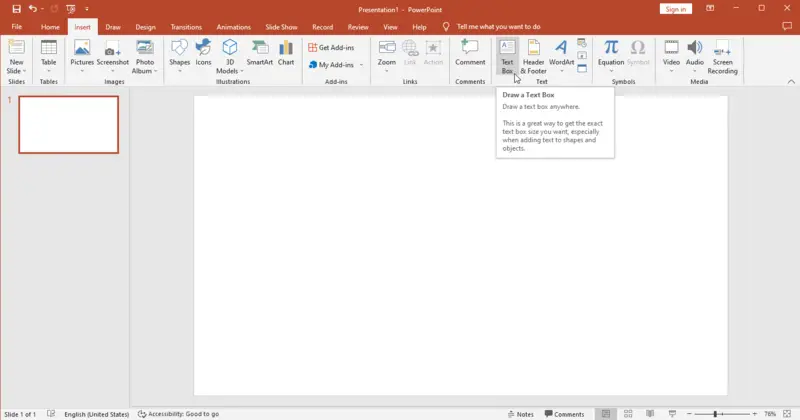
- Select the "Insert" tab at the top.
- Click on the "Text Box" icon in the "Text" group and draw it onto your sheet.
- Input the preferred words. Customize the font family and size as needed.
- Access "Format Shape". Modify the fill color to a subdued option (for example, light gray) so the mark is present but unobtrusive.
- Adjust opacity by dragging the slider left or right until you reach the desired transparency level.
- Press "OK" to save and apply the changes.

Option Two. WordArt
Adding your watermark with WordArt is very similar to a text box:
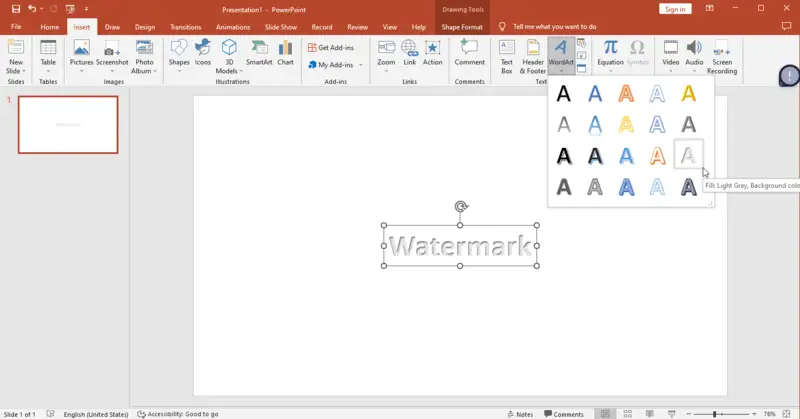
- Navigate to the "Insert" tab and select "WordArt" from the "Text" section.
- Enter the desired text and format it.
- Right-click on the object, then pick "Format WordArt".
- Under "Fill & Line", hit the "Fill" dropdown menu - "Picture/Texture Fill".
- Press "File" and choose an image from your computer that you'd like to employ as a backdrop.
- Alter the dimensions and placement are done, tap "Apply".

Note: This process must be repeated manually for each slide that requires a watermark, as PowerPoint does not automatically apply the effect to all pages.
Option Three. SlideMaster
Look how you can add a watermark using SlideMaster in Microsoft PowerPoint.
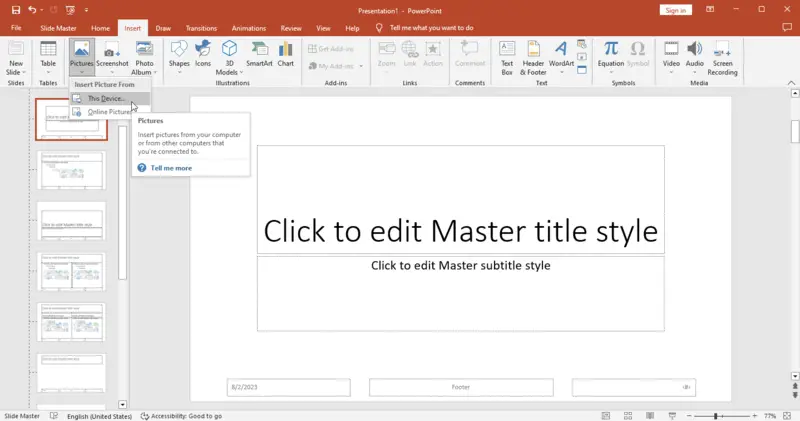
- Open your presentation and head to the "View" tab. Press the "Slide Master" option.
- In "Slide Master" view go to "Insert" and select "Picture".
- Find the image you want as your watermark and click "Insert". The picture will be placed across all sheets linked to that layout. Adjust the size and position as necessary to achieve the desired effect.
- After configuration, switch back to "Normal View" and save.

Are PowerPoint watermarks effective?
When it comes to protecting your presentations, logos get thrown around a lot as a solution. Adding a watermark—whether it’s text or a footage—definitely communicates ownership. It marks the paper as yours, at least to casual viewers.
But let’s not oversell it. Anyone with basic skills in PowerPoint can remove or cover up a watermarking element fairly easily. We’re not talking any real encryption here. So, if what you need is actual content protection, a watermark alone's pretty flimsy.
The best practice? Apply a watermark in combination with password protection. Taken together, they raise the bar. Screenshots? Sure, technically they’re still possible, but at least there’s a visible phrase baked into every slide, discouraging casual misuse.
Types of watermarks on documents
| Kind | Description |
|---|---|
| Text-based | Displays phrases or words across the document. |
| Graphic | Integrates logos, symbols, or other visual elements into the background. |
| Diagonal | Positioned at an angle across the page. |
| Patterned | Features a repeating design or motif throughout the content. |
| Hidden | Embedded within the file. |
| Confidentiality Mark | Denotes privacy, commonly indicated by terms like "Confidential" or "Proprietary." |
| Timestamp | Includes creation or modification dates, useful for version tracking. |
Tips: add watermark to PPT file
- Start with the basics. Begin by adding plain objects—text, shapes, or images—to function as your watermark.
- Choose a template. Consider premade templates that include compatible watermarks to streamline setup.
- Learn the tools. Access PowerPoint’s design tools to modify color, transparency, rotation, and positioning of elements.
- Try different fonts. Select an appropriate font that stands out but does not interfere with the content of your presentation.
- Select a good placement. Insert a watermark at the bottom, top, or within the slide master backgrounds to validate persistence across all pages.
- Make it unique. Create a custom watermark with your logo, business name, or website URL to affirm the slideshow is unique and easily recognized by viewers.
- Keep it subtle. Make sure the watermark does not take away from other information on the page. Deploy light colors and check that it does not dominate the slide design.
- Use a picture. Incorporate a picture or logo as a watermark and alter its size and translucency to guarantee it is not excessively obtrusive.
- Save as an image. Retain your watermark as an image file and practice it as a background when creating new presentations in PowerPoint.
- Test before sharing. Examine out your work on multiple devices. This will help ensure that everything looks good before you share it with others!
FAQ
1. Where does my added watermark appear on my slides?
By default, the watermark is layered beneath all primary slide content. Users can reposition it as needed; placement isn’t locked.
2. What is the best way to position my watermark?
The optimal approach to placing the watermark depends on your layout and intended messaging. Typically, putting near the bottom and slightly off-center maintains visual integrity without interfering with main content.
3. How do I change the opacity of a watermark in PowerPoint?
To modify the transparency of a PowerPoint watermark, click "Design" and select "Background" then choose "Customize Watermark" and adjust the slider to set the desired opacity level.
4. Can I adjust the size of my added watermarks?
Yes, when inserting a picture or text-based watermark, you have the option of adjusting its size by entering specific dimensions into the boxes located in the Format menu (Design tab).
5. Does adding a watermark affect my presentation's file size?
Generally speaking, inserting a watermark should not significantly alter the size of your presentation. But if you are using high-resolution images for your background or multiple layers of pictures/texts then it may lead to an increase in file size.
6. Can I have separate watermarks on different slides?
Yes, you can apply different watermarks by creating multiple layouts in the Slide Master, each with a different overlay.
7. Can I save a PowerPoint template with a watermark?
Yes, create the watermark in the Slide Master, then save the presentation as a template (.potx file).
8. Will the watermark be visible in printouts?
Yes, unless you specifically set print options to exclude background graphics.
How to add a watermark in PowerPoint: conclusion
Inserting a watermark in a PowerPoint is a practical method for asserting brand presence.
Placement is crucial—avoid overwhelming your content by opting for a semi-transparent design, positioned away from key information. Subtlety is more effective here; the watermark needs to be recognizable, but not disruptive.
Honestly, embedding a watermarking isn’t complicated at all. Just take a minute to place it carefully and adjust transparency for optimal impact.
The technique’s simple, but it really locks down your slideshow’s look.
If you chose the first option, you can do further editing of your PDF presentation:
- Compress PDF prior to sending it to others.
- Get rid of unnecessary margins or simply change the document's dimensions by resizing your PDF.


